When my children were little, we had one of those nifty crayon makers and they truly enjoyed manufacturing their own crayon colors and designs. Over time, though, the interest waned and after a few years of collecting dust on my craft room shelf, the crayon maker was donated to a local shelter.
Fast forward a few years – After an extensive cleaning spree of closets, desks and toy boxes recently, I accumulated a box full of broken crayons and naturally, I went in search of the crayon maker only to remember it had now found a new home. I recalled having tucked away a crayon project and sure enough, after digging through my craft files, I found a clipping from Country Woman Magazine with a reader contributed suggestion of melting old crayons in muffin tins… and the spark was lit!
I gathered my sons and set them to peeling the wrappers from crayons, then set about modifying the instructions a bit. With a few tweaks, we had a super fun craft project in the works!
Materials Needed:
Mini-Muffin Tin
Mini-Muffin Liners
Broken Crayons
Instructions:
1. Unwrap paper from crayon pieces and break into small pieces.
2. Preheat oven to 350 degrees.
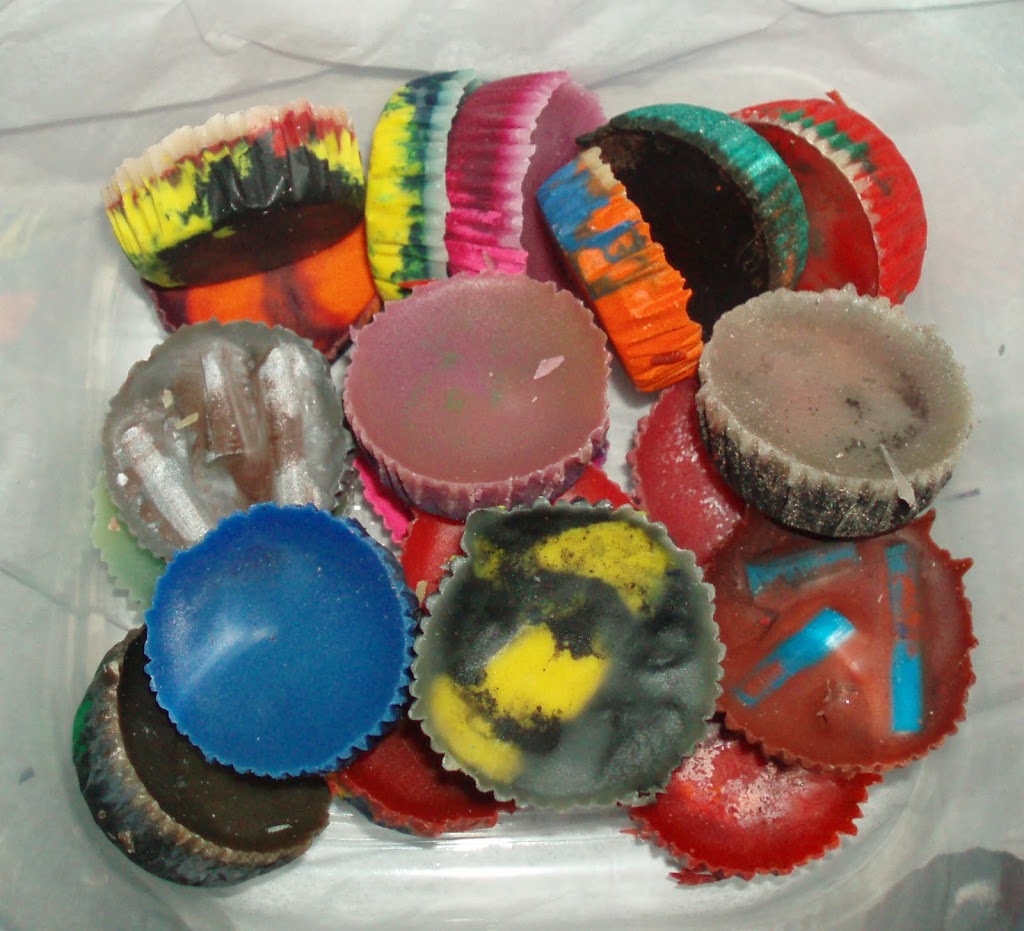
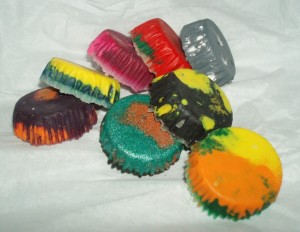
3. Place mini-muffin liners into each mini-muffin slot (you can complete without the liners, and the tip I found suggested that, but I figured cleanup would be easier with the liners and it certainly was a breeze. Plus the liners added little ridges to the discs making them look a little bit like peanut butter cups.)
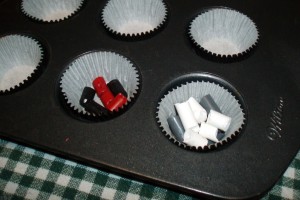
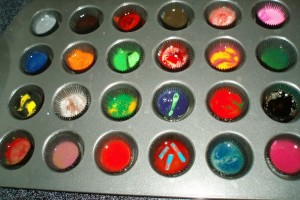
4. Decide what color spectrum you want for the crayon and place crayon bits in mini-muffin liners accordingly. My sons decided to do superhero-themed colors for some crayons, princess colors (for their niece) for others, and a random array for the ones the left. You can also use all crayons of the same color or similar color range, if you prefer.
5. Fill each cup about two-thirds full with crayon bits. You can fill them higher, but the wax may melt over the edge making clean-up more difficult (experience speaking here…)
6. When all slots are full in the mini-muffin tin and the oven is pre-heated, turn oven off and place the muffin tin on the center rack. Allow tin to set in oven for 20 -25 minutes (or until crayons are completely melted.)
7. Remove muffin tin and allow melted crayons to cool for at least 2 hours.
8. Remove muffin liners from mini-muffin tin. Pop out crayon discs. Admire the fascinating color mixes and begin again!
Lessons learned: Off brand crayons may not fully melt. You can leave them in the mix as they make interesting lines in the final product, or once you spot them, simply eliminate them from your next mix.
Some crayon colors may separate, leaving a clear thin layer at the top or bottom of your crayon. While it may not deliver any color when used, it does look kinda neat, so don’t worry if this happens.
If you fill the muffin tins (or muffin liners) too full, the wax will overflow which will make cleanup a little more challenging if you are using liners, or may cause color bleed into other muffin crayon cups.


We used to make these all the time when the kids were younger. They came up with some wacky colors.
What a creative idea! I can’t wait to try this with my son. Who needs to buy those “chunky” toddler crayons either when you can make nice big crayons like this. I love the shape for my little one!
I think this would be a wonderful project and my grand kids would love doing it so this summer we will be creating our own crayons.
did you use just regular paper liners? somewhere I had read that you had to use metallic/foil ones or they thought it would catch on fire. true? not true? we have tons of broken crayons and 2 kids that love to color!
Thanks for stopping by everyone! Hope you have lots of fun with your crayon discs.
Jill, I used paper liners – standard Wilton cupcake liners- with no problems. Foil is likely a better option, but paper ones worked well.
You don’t have to use a liner at all, but it certainly makes lifting the crayons out a lot easier and clean-up a cinch.
Hope that helps! Enjoy!
what a creative fun idea, we will have to try this!