Air Dry Clay Christmas Ornament DIY Mouse is adorning my tree this year. Making our own Christmas ornaments have been a tradition at my house for over 30 years. My children and I
made ornaments with salt dough. while they were small. Making this air dry clay Christmas ornament is fun and creative for the whole family
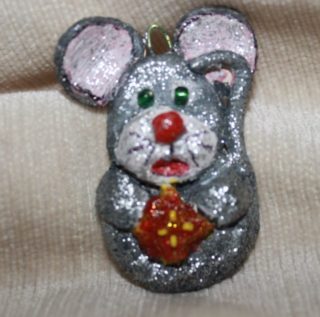
Air Dry Clay Christmas Ornament DIY Mouse
This was the first time I had worked with the air dry clay so I prepared my work surface, gathered my supplies and got ready to have fun.
- Materials needed to make air dry clay Christmas ornament
- Air Dry Clay
- Cloth or paper towel to work on
- Ruler
- Paint brush
- Wire for hanger
- optional: use paper clip snipped to insert in head.
- Water in small lid to seal parts together
- Swabs
- Tooth picks
- Acrylic paint
- optional:
- Glitter Paint
-
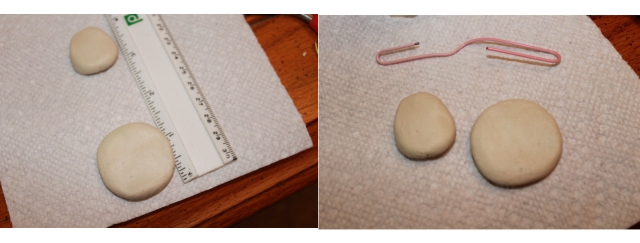
Getting Started
I pinch off clay and knead it until it is soft and manageable. I begin by forming two balls, one for the head and one for the body to make this air dry clay Christmas ornament.
Keep the ornament light so it does not weigh down the tree branches. I make the circle for the head about 1 inch flattened and the body about 1 1/2″. I taper the head at the top so it is not a complete circle.

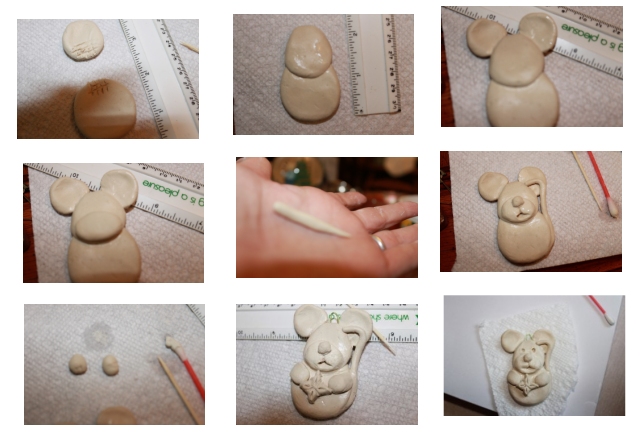
I use Cross hatching techniques by simply taking a tooth pick and score the clay in vertical and horizontal lines on each clay piece I want to join together. Apply water with a brush or swaps and then put the two parts together. Press together so the two parts are firmly attached to one another. Take the swap or brush and seal the head and body together.While your mouse is turned over and you haven’t begun the face it is a good time to take a toothpick and write your name and the date on the back of the mouse.
I used a paper towel for my surface to construct my mouse.
Turn your mouse back over and begin making the ears, hands, tail and facial features.
How big or small you make the ears of your mouse is up to you. You can change the whole personality of you mouse by the size of the ears you choose. I used about 3/4 of an inch at first and adjusted the size to balance the size of the head. Cross hatch the bottom of the ears and head and then use water and smooth the ears on to the head for a smooth look.You can judge the size of muzzle to make for the mouse’s face. Making the muzzle is optional as you can omit this step and just put a nose and facial feature on. I like the dimension it adds so I make my mice with muzzles. Again, I cross hatch both pieces to give it a solid seal and then smoothed the outside edges with a wet swap.
Next create a tail. Pinch off some clay and begin rolling it with one of your hands on your other hand’s palm. It starts taking the shape of a worm.
When attaching the tail make sure to lay the tail onto the mouse’s body. Tails that are just formed and hanging without being attached to the mouse will usually break off in time.Cross hatch on the side of the body and the tail and attach them with a moist swab or brush and then gently push them together. Smooth the edges to merge them together with your brush or swab.
Next pinch off two tiny pieces of clay and roll them into a ball for the hands. Attach them as previously done before.
I make a tiny ball for the nose and also one for the ornament for the mouse to hold. I take the ball for the ornament and pinch the sides to bring them to a point and score them with the tooth pick. I do the same for the face. I make indention for the mouth and two holes for the eyes. You can also paint faces on your mice and eliminate this step. Now is also a good time to insert the hook into the top of the head so you can hang your air dry clay Christmas ornament. You also can skip this step if you would prefer to just make a hole and cut thread and knot it for a hanger too. Just don’t forget to do one or the other.
When you are happy with the mouse take a damp swab or brush and smooth any rough edges. See how much nicer the eyes look when I smoothed them?
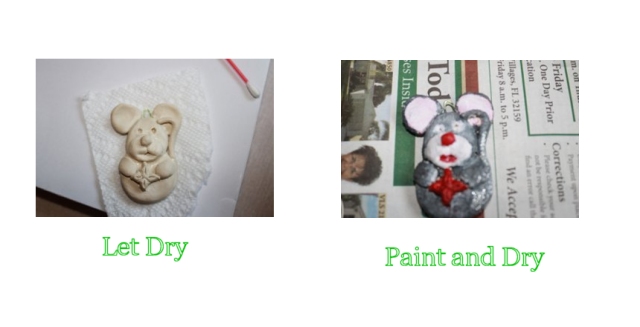
The mouse is ready to dry. I dry my mouse by placing it in a plastic bag over it for a day to prevent it drying too quickly and cracking. I then take it out of the bag and let it dry until hard. This may be an unnecessary step and I’ll experiment with this on the next project.
After drying it is ready to paint.
I mix black and white paint for a gray color for the mouse.I use red for the nose and the ornament as a base color and mix red with white for a slight pink tinge for the inside of the ears.
After the mouse dries I take the glitter paint and cover the mouse and then add beads for the eyes and on the ornament.Have a Happy Holiday~Grace