 |
| Handmade gifts are my favorites and I love to spread the joy. Special thanks to Consumer Crafts and The Blueprint Social, for helping me to make these gifts as a random craft of kindness! |
Each year, my holiday craft aspirations are quite ambitious, but my pocketbook is not always accommodating. When I first found ConsumerCrafts.com, suddenly a few projects I had dawdling in my mind, like creating a rustic holiday wreath, became real possibilities… because the discounts are so crazy-good, I can afford bundles of craft goodness!
Even if I didn’t have the idea planted in my head already, I would have been inspired to make something special and share the craft love. This is the basis of a “random craft of kindness” (kin to “random act of kindness” but with crafts involved!)
After browsing Consumer Crafts and finding a great selection of floral supplies, I decided that I wanted to help brighten up my neighborhood and bring Christmas craft cheer to my neighbors with handmade wreaths.
Rustic-style wreaths with pops of glitter are my favorite to put together as they suit our country style and add a touch of pizzazz. I knew our neighbors would love them, but also needed to keep the prices down. The amazing pricing at Consumer Crafts allowed me to purchase supplies for three wreaths (and extras) for under $30!
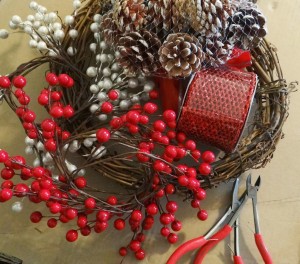
Supplies Used:
Grapevine Wreath, 12 inch
Berry Garland, Shiny Red, 6 feet
Berry Garland, Pearl White, 6 feet
Cloth-covered Wire, Green 30 Guage
2 1/2 inch Glitter Mesh Ribbon, Red 10 yards
Pine Cones, White-Tipped Natural
Wire Clippers
Glue Gun
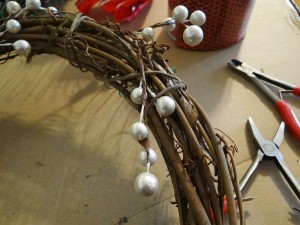
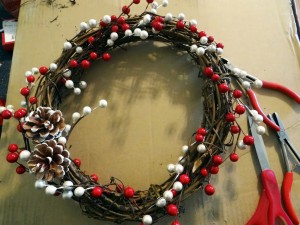
Putting together a rustic wreath with berry garland couldn’t be easier. As the berry garland is already set in wire, you simply wrap the garland around the grapevine wreath and position it where you would like it.
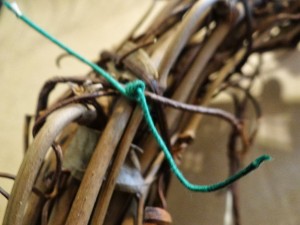
I like to wrap the garland around the wreath loosely, leaving a few inches between each overlap (as shown above.) Once I have the garland set in a position I like, I secure the garland to a few places on the back of the wreath using small pieces of cloth wire.
When the garland is secured, snip the end and reserve the rest for the next wreath.
If desired (and I happen to prefer this look,) you can repeat this step with a second garland color. Overlap the garland and wrap it around as you see fit. There is no “perfect” way to wrap the garland around the wreath… and the beauty is in the imperfection!
Once the garland is arranged and secured, you could stop and have a charming little wreath, but as it’s the holidays, I like to pump up the volume a bit with embellishments.
For my wreaths, I decided a few pine cones and a big bright bow would add a lot of festive winter flair.
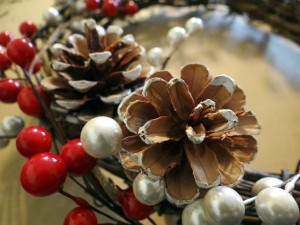
Position the pine cones where you think they will work best and then fashion your bow. I created a loose, free-form bow using the mesh ribbon… then later decided it needed a bit more bow (that I borrowed from my craft stash) and a pine cone center.
I decided to fashion the bow and pine cone design so that the wreath will look best if hung with the bow positioned slightly higher on the left side. You can make a bow for the top, bottom, sides or whatever style suits your craft fancy!
When the bow was ready, I secured the pine cones to the wreath and the bow center with a glue gun. Next I secured the bow to the wreath using cloth covered wire. The very last step, after the glue was dry was to trim the lose ends of the cloth wire and viola! Easy-peasy pretty holiday wreath ready to gift to my neighbor!
Who would you like to make a wreath for this year? Can you think of other “random crafts of kindness” you’d like to gift this year?
To find out more about Consumer Crafts visit them at:
Facebook: http://www.facebook.com/ConsumerCrafts
Twitter: https://twitter.com/Consumer_Crafts
Pinterest: http://pinterest.com/consumercrafts/
Instagram: http://instagram.com/consumercrafts
Blog: http://www.craftsunleashed.com/
Need more inspiration? You’ll find additional Random Crafts of Kindness from my fellow Blueprint Social Bloggers here:





I love your wreaths and your kindness challenge. I’ve crocheted angel pins for women and book marks for men as craft kindness gifts.
What a pretty wreath! I bet that my son could help me to make this as a random craft of kindness for one of our neighbors.
That’s really cute. I made a wreath over the summer but it’s time for a new one.
That is nice! I can never get my bows to turn out like that. I have been trying but….and how sweet to give a gift of kindness.
These wreaths are beautiful. I’ve always wanted to try my hand at creating wreaths for the holidays but I never knew how to go about it.
Very pretty. I would love to have a wreath like that at my front door. I really need a new one so, I may have to try this.